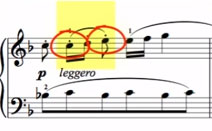
If you play the piano you have probably heard octave tremolos and were taken with how they sound. Today we are going to talk about how to approach these with the “Alla Turca” movement of the Mozart K331 Piano Sonata in A Major.
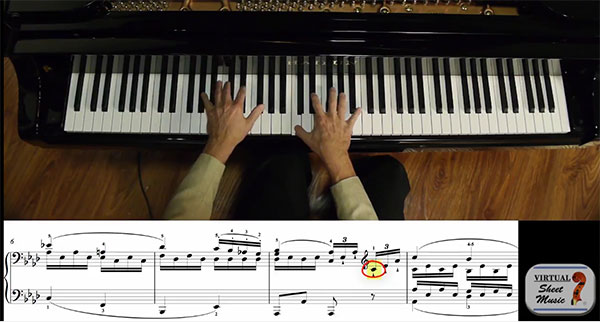
The secret to playing broken octaves – or octave tremolos – is first learning how to play octaves properly. One of the biggest secrets is using the correct fingering. You’ll want to use the first finger (thumb) and the fifth finger on all white key octaves – and thumb and fourth finger on black key octaves. This might seem like a small thing but it’s incredibly important to developing your octave playing by dividing the load between the fourth and fifth fingers which makes it much easier to play them quickly.
When you play octaves you will notice that the first finger (thumb) is much heavier than your fifth and fourth fingers. This is because your thumb is much stronger than your other fingers and you will have to learn to balance the weight of your hands. A great way to practice this technique is to play the top notes (fourth and fifth fingers) legato while playing your first finger (thumb) staccato. This might be tricky at first but keep practicing it because you will produce much more power on the top notes and your thumb will do it’s job with minimal weight.
The other thing that is essential is avoiding tension. One way to alleviate that problem is to practice in note groups. In this particular piece you can practice the first three notes of the broken octaves and relax your wrist and arm. If you feel yourself getting fatigued you should rest your hands and come back to it a bit later in your practice. Never put unnecessary strain on yourself and make sure you are keeping your hands, arms and body relaxed. As you develop more strength in your hands you will be able to practice for much longer periods of time. Your best bet is practicing octave tremolos for short periods of time throughout the day. That way you will develop strength and avoid injury.
Thanks again for joining me Robert Estrin Robert@LivingPianos.com